While you can use disposable emails for such services, the services that offer disposable email IDs mostly offer weird email addresses, which are often blacklisted by websites and the good ones that are available are mostly not free. The good news is, there’s another way. You can use email aliases, which is a built-in feature in popular email services like Gmail and Outlook. This feature provides a temporary email address, that you can use to sign up for different websites. However, before we talk about how you can use the email alias feature in Outlook and Gmail, let’s first give you a brief insight on what an email alias is, shall we?
What is Email Alias and Advantages of Using It
Email Alias is an alternate email address that you can create within your primary email. This alternate email address will point to the primary email address you already have. All the emails received in the email alias will be delivered to your default inbox and you can also send emails from it. Basically, an email alias can be used to mask your original email address for scenarios where you don’t want to share your default, permanent email address. The email aliases are temporary in nature and if in the future you don’t want to receive any emails on the alias id, you can just delete the alias and that’s all. To give you an even better picture, here are the advantages of using an email alias:
How to use Email Alias in Gmail
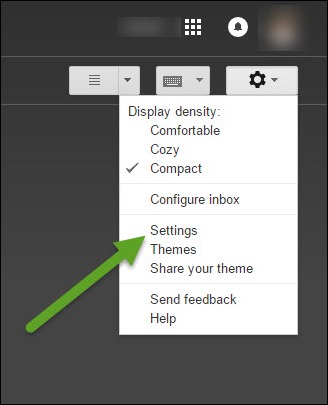
Configuring email aliases in Gmail is quite easy. All you need to do is follow these steps: 1. Login to your Gmail account and click on the gear icon on the top right and go to “Settings”.
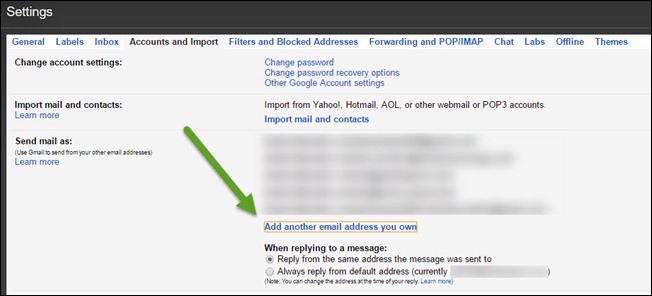
In the Gmail settings page, go to the “Accounts and Import“ tab and look for the option “Send mail as”. Here, click on the option “Add another email address you own”, which should open up a new window.
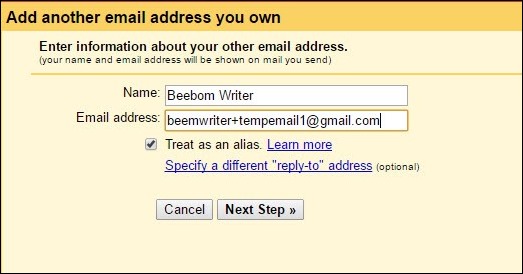
In the Name field, enter the name and the new email alias you’d like to use. The format for the new email alias has to be
+ @gmail.com. For example, if your email address is name@gmail.com you can create an alias like name+tempemail@gmail.com. That’s all, you can then save the settings and once it’s done, you will be able to send and receive emails using the new alias. The only limitation is that the alias is good for scenarios where you need to provide the email to self-serviced pages which work automatically. If it’s a person you are giving the email alias to, he/she would easily be able to decode your primary email address. In situations like these, using an Outlook email alias makes more sense. Important Tip: Did you know that you can add period(.) anywhere in your Gmail address and it will make no difference. For example, firstname.lastname@gmail.com is same as firstnamelastname@gmail.com and f.i.rstname.lastname@gmail.com?
How to use Email Alias in Outlook
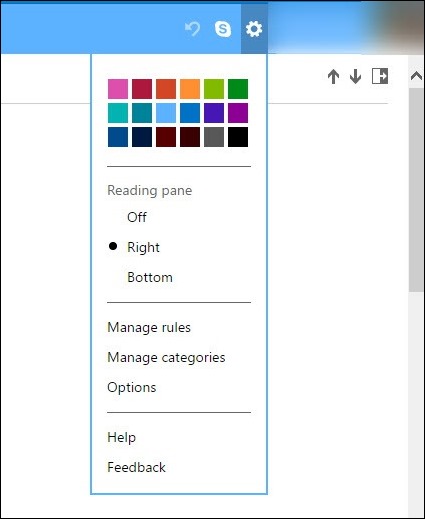
Using email alias in Outlook makes more sense because it doesn’t include hints to your primary email address, unlike Gmail. So, here’s how to create an email alias in Outlook: 1. Sign into Outlook email page, click on the gear icon on the top-right and then select the option “Settings”.
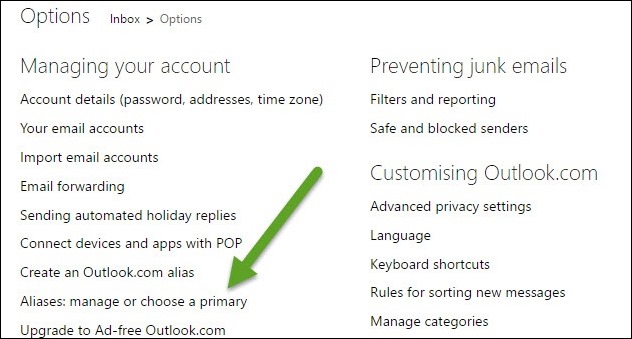
In Email Options, look for “Aliases: manage or choose a primary” and click on it. You will be asked to provide your login credentials again for security reasons.
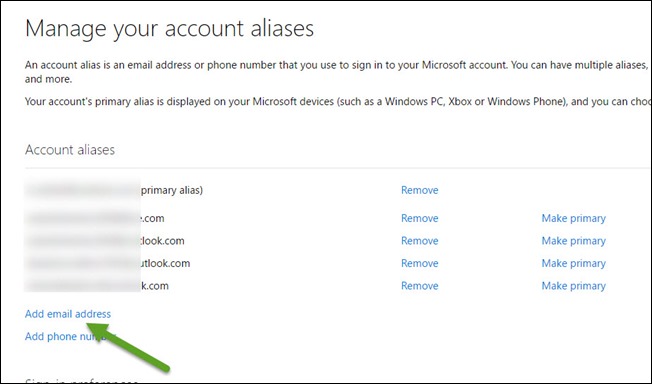
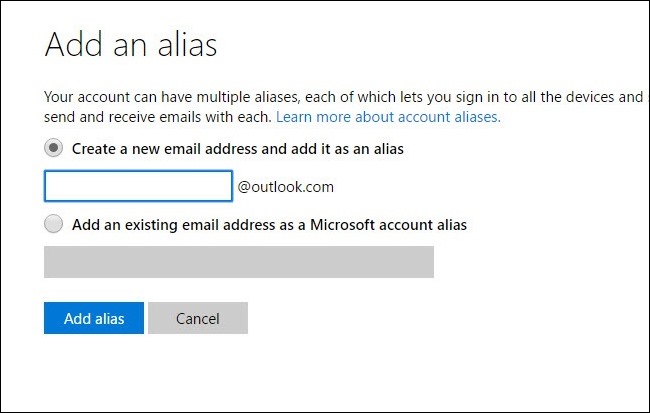
Once you are on the Account Alias page, you can click on “Add email address” and enter any email address. Outlook will check if any such email address exists and if no match is found, it will be assigned to you in a short while. You will also get an email confirmation once the alias is active. Well, that’s it, pretty easy, right?
SEE ALSO: How To Find Email Sender’s Identity And Location
That Covers it All
Well, we are pretty sure that you can now setup your email alias on Outlook and Gmail and use it to ensure your privacy and at the same time, stop spams and marketing emails. You can create as many email aliases as you want, since even deleting them is very easy. If you still have any queries about email aliases, do drop a comment below and you can count on us to get back to you.
