How to Enable Window Naming in Chrome OS
Whether it’s to distinguish your work Chrome windows from windows playing Netflix and YouTube, or it’s just something you wanna try, Window Naming is a neat new feature in Chrome OS 87. As such, it’s important that you have updated your Chromebook to Chrome OS 87 before trying this out. If you have, just follow along our guide to enable and use window naming right away.
Launch Chrome and head over to chrome://flags
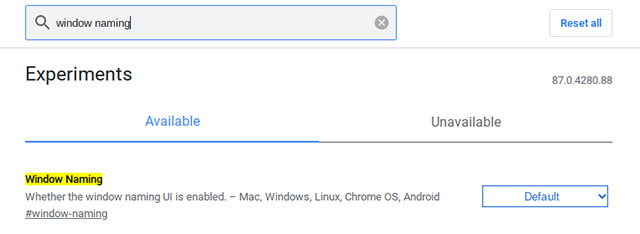
Here, search for ‘window naming’. You will find a flag called ‘#window-naming’.
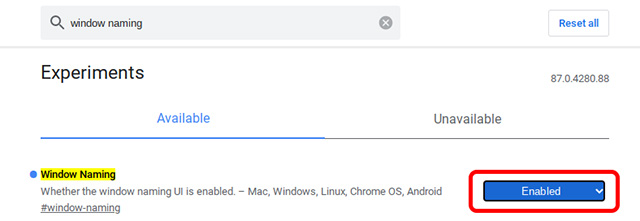
Click on the drop-down menu that says ‘Default’ and change it to ‘Enabled’.
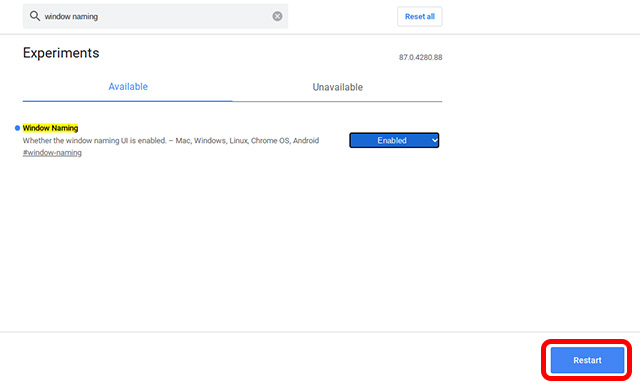
Finally, click on the Restart button in the bottom right of the screen.
How to Use Window Naming in Chrome OS
Now that you have enabled window naming on your Chromebook, here is how to actually name windows in Chrome OS.
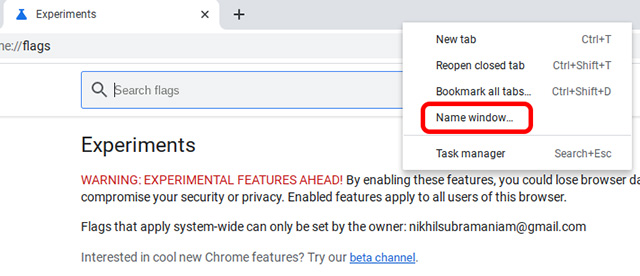
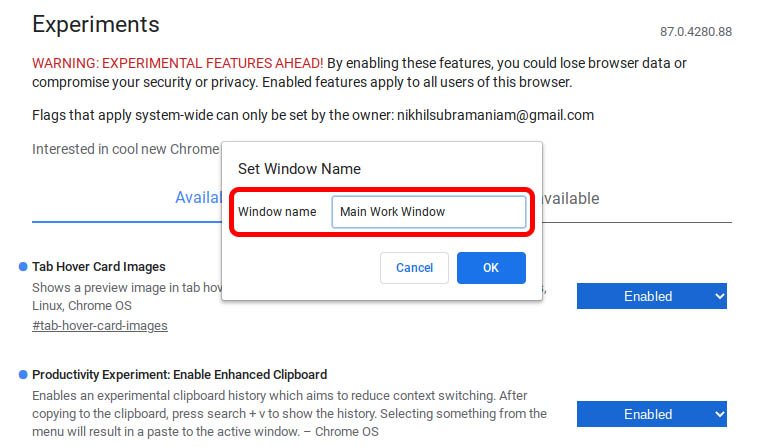
Right click on the title bar of any Chrome window on your Chromebook. A context menu will pop up with a bunch of options for the window. Towards the end of this list you’ll see the option to set a name for the window, aptly called ‘Name window’.
You can set any window name that you want.
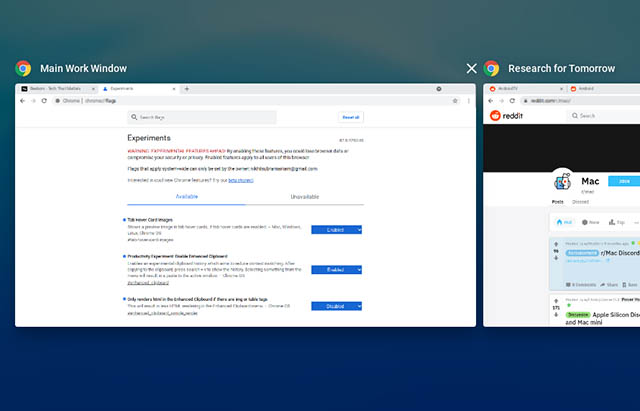
Then, whenever you use the Alt+Tab shortcut in Chrome OS to switch between windows, you will see the names of the windows that you have assigned.
Believe me, if you ever find yourself with more than three separate Chrome windows open on your Chromebook, this feature will prove really useful.
Enable Window Naming in Chrome OS and Organise Your Workflow
Personally, I usually only use my Chromebook for a couple of things — mostly work. However, I do end up researching multiple things at the same time, which means I have multiple Chrome windows open for different topics. So the new window naming feature is pretty useful for me. But what do you think? Is this something you want to use as well? Share your thoughts in the comments down below.

